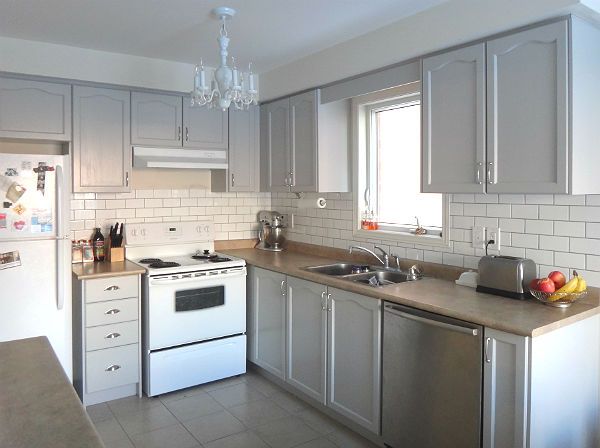
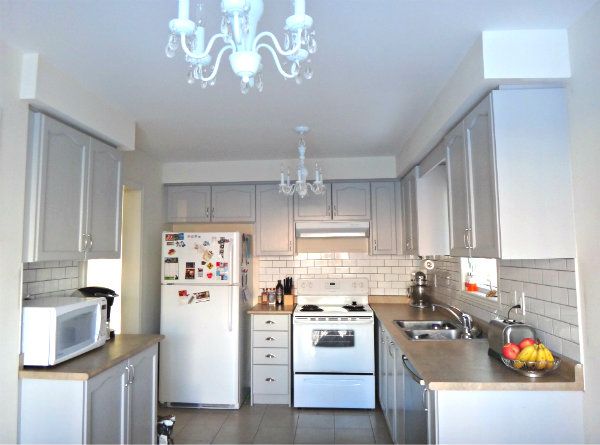
Finally, a update on the kitchen! This is one of the few places in the house that hadn't been touched at all since our move fall of 2011.
Below is what it looked like last summer. A only change made in the fall was the replacement of those chairs with 4 white chairs in the Eames Eiffel style (click here for my post on those chairs
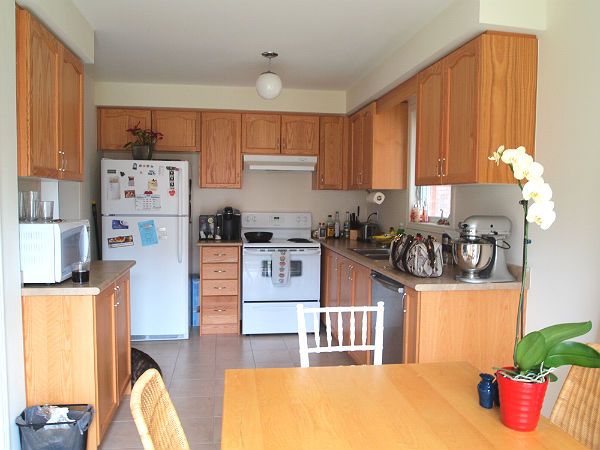
I love how big and well laid out our kitchen is, considering the relatively small size of our house (our fully-detached house is smaller than the semi-detached and townhouses in our area!). Some of the other houses we've toured have a very narrow galley-style kitchen. However, what I didn't love as much were the dated oak cabinets. The previously owners did absolutely no upgrades whereas many other houses opted for dark or white cabinets.
So I decided to take a gamble on the Rustoleum Cabinet Transformation kit. I'm sure many of you have heard of this kit already but if not, it's a kit that includes almost everything you need to repaint your kitchen cabinets. The process is straight forward - clean the cabinets, degloss, paint 2 coats, clear coat, and done! In reality, it's a very easy but extremely tedious process with long wait times between each step and well, just a of lot of boring painting involved.
Below is a picture of the before and sort of after. In this photo, most of the hardware has not been added back yet. I'm planning to finish it this weekend. Also, please try to ignore the mess! Everything is a mess as I've been moving applicances and stored items around for this painting project.
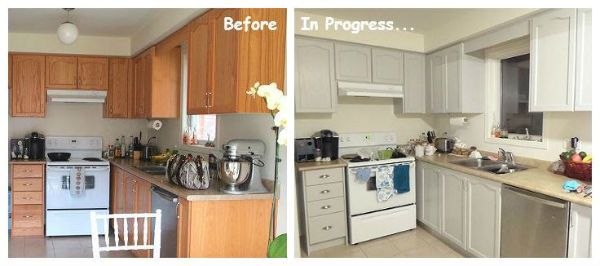
The color I chose is Winter Fog. It is a cool-toned light gray. The other contenders were Pure White, Linen (a warm off-white), and Kona (a dark black-brown). I decided against the whites as I felt they might've been too traditional and again Kona as our living room is darker and I wanted something more airy for the kitchen. I did not use the decorative glaze which would've made the color slightly darker/warmer and "rustic". I'm going for a more transitional classic-to-modern look and I felt that the glaze would give the kitchen too much of a French country vibe.
I'll take close-ups and more photos in natural light for those of you considering using this kit or this particular color.
Now that I've painted the cabinets, it's giving me the drive to do more upgrades in the kitchen. I've got tons left to do in this space but here's the big ones on the list:
Backsplash - I'm thinking either penny tiles or subway tiles. I'm thinking of ceramic white or translucent glass in white, seaglass, or pale gray.
Over-The-Range Microwave - After hosting a 13-people brunch recently, I realized that was pretty much the max dining capacity of our house at this time. But also, I realized that I was in serious need of additional counter space for both prepping and serving. This type of microwave would free up the separate counter wthat currently holds our stand-alone version.
Roman Blind - I'm going to tackle a DIY roman blind for above the sink. That window just looks into our neighbours so I'm looking for bold patterns/colors. While the gray is cleaner than the oak, it does make the room very washed out unless some color is added.
Can't wait to get started keep going!