Showing posts with label kitchen. Show all posts

Wednesday, April 17, 2013

Kitchen Progress - Paint & Photoshop

A little more progress has been made on the kitchen with a touch of paint and a dash of photoshop.

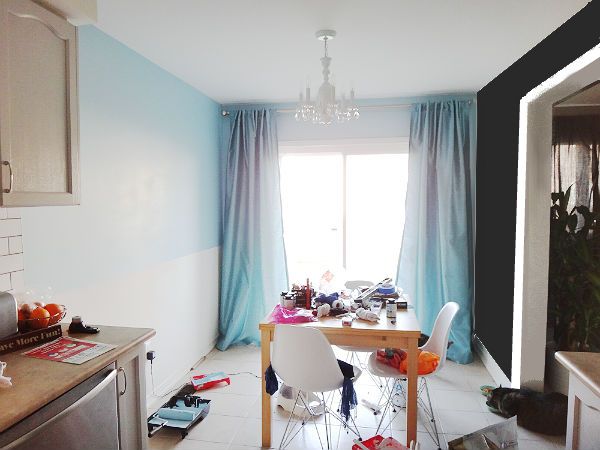
I painted most of the left and back walls in Martha Stewart's Aegean Blue. Let's not kid ourselves...it's baby blue. The kind you use in nurseries. But it's what I had on hand on a Sunday afternoon after all the stores had closed. The Martha Stewart sample paint pots went on sale for $1 (usually $5-6, I believe) at Home Depot last year and I went crazy, buying multiples of each color. I've already used 5 in the powder room (Araucana Teal) and just knew I could find a use for the others! I still have a few colors left which you might see in future projects...

I decided I can live with a baby blue wall once I added a little more elbow grease into the mix. I didn't want this color to overpower the small nook, so I left the bottom 40 inches white (same height as the kitchen countertop) in preparation for moulding. This will continue from the end of the kitchen counter to the corner of the back and right walls.

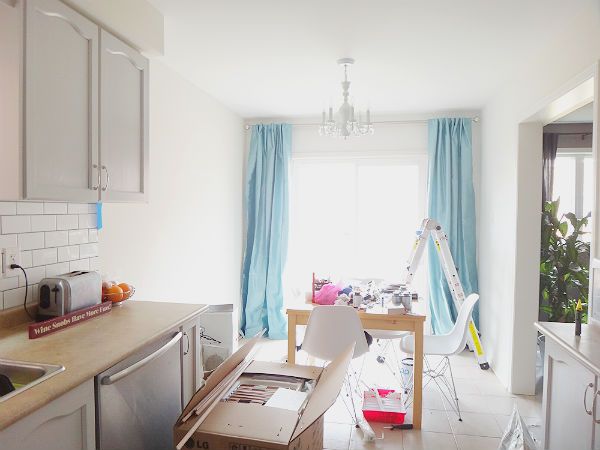
On the left side I did a little photoshopping. The black represents the magnetic chalkboard wall. The space was starting to look a little too dramatic and elegant for its small size so this "fun" wall will add a little contrast and lighten the mood. Plus, it'll be nice to have a wall sized notepad to practice my chalkboard skills, write a few pick-me-ups, and plan out our week.

FYI, the curtains are Target, the double curtain rods and blue paint are Martha Stewart. The kitchen table is Ikea. The chairs are Kitchen Stuff Plus. The chandelier is Rona. The magnetic paint and chalkboard paint (to be purchased) are by Rustoleum.

Sunday, April 14, 2013

Kitchen Progress - The Other Side

I have a cold. And it sucks because I'm at the stage where drugs (in this case Tylenol Cold & Sinus Extra Strength) keep the symptoms muzzled. Unfortunately, coughs do not seem to be part of the deal. While out buying a laser level, which by the way is the absolutely best invention ever, I coughed so uncontrollably I had to run to an un-populated dark corner of the store to hack my lungs out!

Anyway, the point is....despite my illness, I couldn't sit still this weekend and had to start working on the "other side" of the kitchen aka our breakfast nook aka our dinette aka where guests have to squeeze in like sardines because we don't actually have a dining room.

Here's a sneak peak of what's happened so far. 1) Hanging the curtains and curtain rods 2) Making a huge mess on the dining table.

Before hanging the curtains, I had painted half the walls from a cream to a white. But afterwards, it just felt too bare and stark for the drama of flowy turquoise fabric. I found a few sample bottles of paint in the same color and should have just enough for most of the left and back wall. Instead of the whole wall, I'm painting about two-thirds the way down. The rest I will keep white and eventually install a chair rail in between.

Stay tuned!

Thursday, March 14, 2013

Kitchen Progress - A Somewhat Final Reveal (For Now)

At the end of January, I posted that I was working on our kitchen and gave a sneak peak. Well, there's still plenty of to-do's let to do, but I'm too impatient to wait until I'm 100% done to show you how it looks. And really, as a DIY and home improvement enthusiast, is any space every completely DONE?

Here's what the kitchen looked like last fall. Oak cabinets and builder grade beige paint. Bland is the name of the game here.

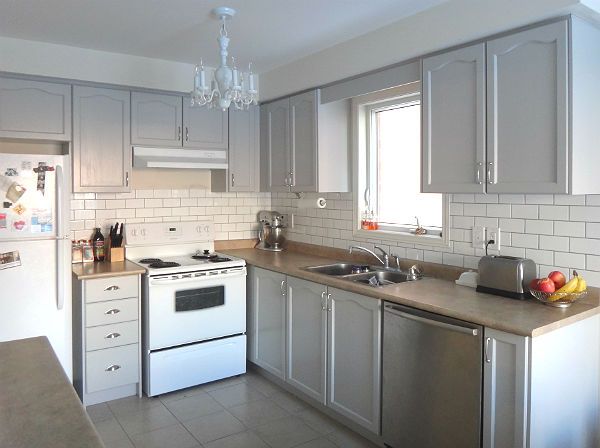
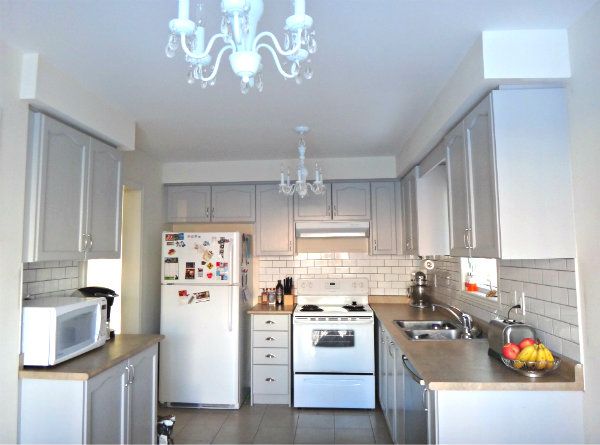
And here's what it looks like today!

What was done:
-A pair of chandeliers for the kitchen and breakfast area
-White subway tile backsplash with gray grout
-Painted kitchen cabinets in Rustoleum's Winter Fog
-Stainless steel cup pulls on the drawers

And that's it! All done for under $300 and that's including buying a couple tools and renting a wet tile saw. I'll admit, it did involve using a couple gift certificates received for Christmas and buying a couple things across the border where some things are significantly cheaper.

What's still to be done:
-Seal the grout with grout sealer
-Install over-the-range microwave or if I can't find one small enough, run the subway tiles up to the rangehood
-Roman blind for the window over the sink
-Accent rug

Once those things are done, I'd like to paint the walls a bright white before moving on to the other side of the room, which is the breakfast area. I'll post more about my plans for that very compact space soon.

Wednesday, January 23, 2013

Kitchen Progress - Refinishing The Cabinets

Finally, a update on the kitchen! This is one of the few places in the house that hadn't been touched at all since our move fall of 2011.

Below is what it looked like last summer. A only change made in the fall was the replacement of those chairs with 4 white chairs in the Eames Eiffel style (click here for my post on those chairs
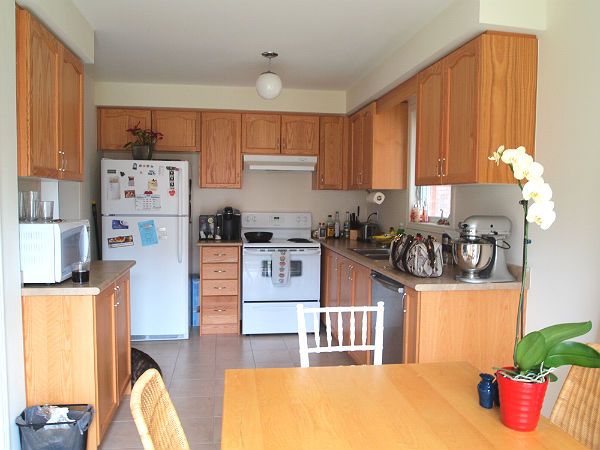
I love how big and well laid out our kitchen is, considering the relatively small size of our house (our fully-detached house is smaller than the semi-detached and townhouses in our area!). Some of the other houses we've toured have a very narrow galley-style kitchen. However, what I didn't love as much were the dated oak cabinets. The previously owners did absolutely no upgrades whereas many other houses opted for dark or white cabinets.

So I decided to take a gamble on the Rustoleum Cabinet Transformation kit. I'm sure many of you have heard of this kit already but if not, it's a kit that includes almost everything you need to repaint your kitchen cabinets. The process is straight forward - clean the cabinets, degloss, paint 2 coats, clear coat, and done! In reality, it's a very easy but extremely tedious process with long wait times between each step and well, just a of lot of boring painting involved.

Below is a picture of the before and sort of after. In this photo, most of the hardware has not been added back yet. I'm planning to finish it this weekend. Also, please try to ignore the mess! Everything is a mess as I've been moving applicances and stored items around for this painting project.
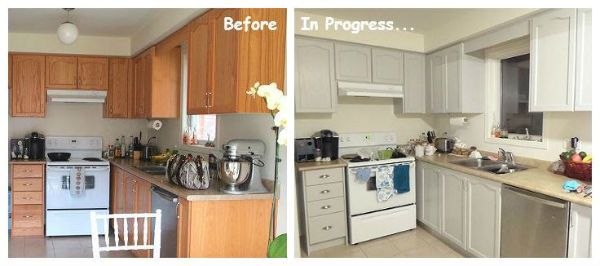
The color I chose is Winter Fog. It is a cool-toned light gray. The other contenders were Pure White, Linen (a warm off-white), and Kona (a dark black-brown). I decided against the whites as I felt they might've been too traditional and again Kona as our living room is darker and I wanted something more airy for the kitchen. I did not use the decorative glaze which would've made the color slightly darker/warmer and "rustic". I'm going for a more transitional classic-to-modern look and I felt that the glaze would give the kitchen too much of a French country vibe.

I'll take close-ups and more photos in natural light for those of you considering using this kit or this particular color.

Now that I've painted the cabinets, it's giving me the drive to do more upgrades in the kitchen. I've got tons left to do in this space but here's the big ones on the list:

Backsplash - I'm thinking either penny tiles or subway tiles. I'm thinking of ceramic white or translucent glass in white, seaglass, or pale gray.

Over-The-Range Microwave - After hosting a 13-people brunch recently, I realized that was pretty much the max dining capacity of our house at this time. But also, I realized that I was in serious need of additional counter space for both prepping and serving. This type of microwave would free up the separate counter wthat currently holds our stand-alone version.

Roman Blind - I'm going to tackle a DIY roman blind for above the sink. That window just looks into our neighbours so I'm looking for bold patterns/colors. While the gray is cleaner than the oak, it does make the room very washed out unless some color is added.

Can't wait to get started keep going!
Tuesday, September 18, 2012

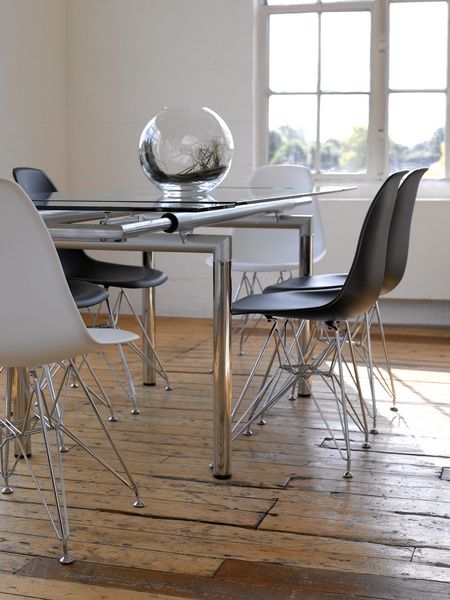
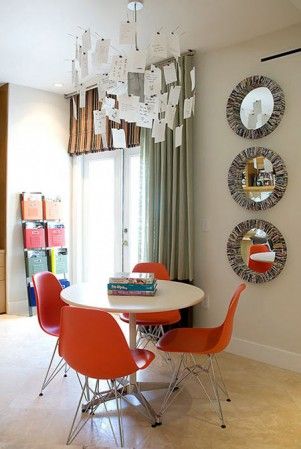
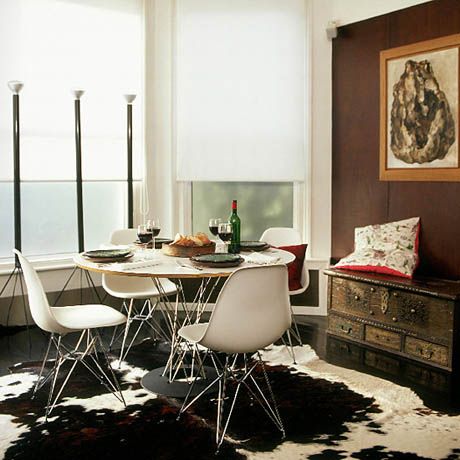
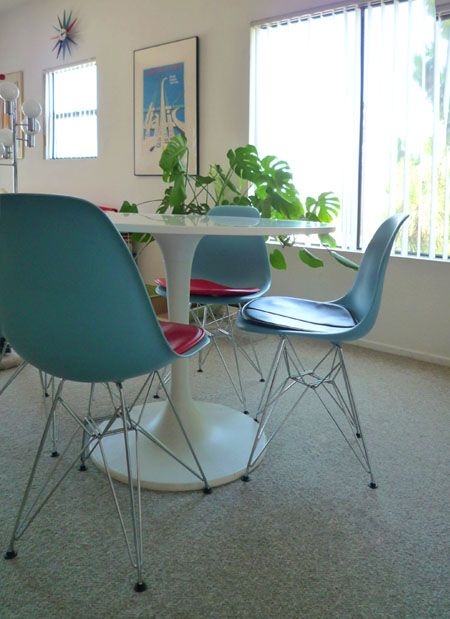
The Eames Eiffel Chair

I'm not generally a fan of mid-century design - I find a lot of items either too cutesy, too contrived, or just too plain old fashioned.

I like pieces that don't scream "I'm from (insert year)!"...or "I'm (insert specific style)!". The frugalista side of me is drawn to pieces that feel home just as well in a bohemian living room as it does in a farmhouse style kitchen.

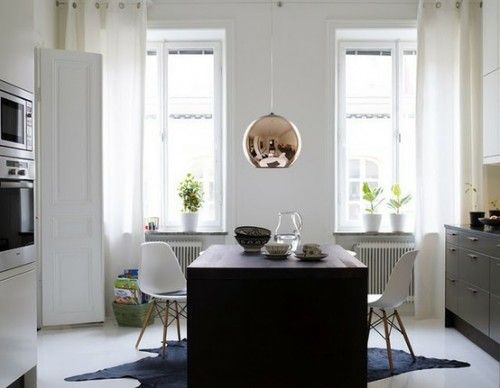
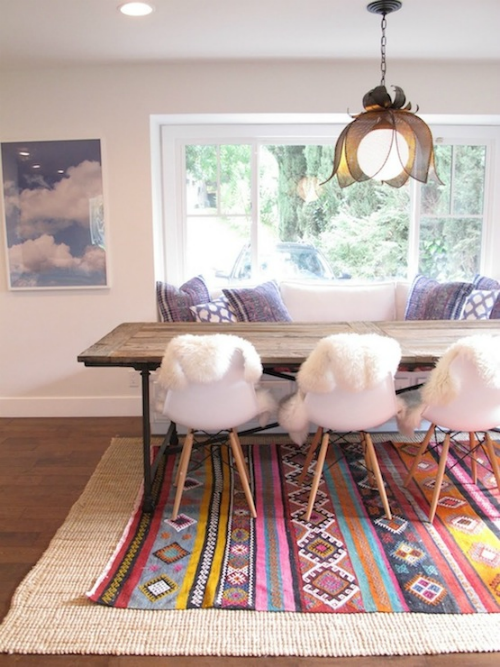
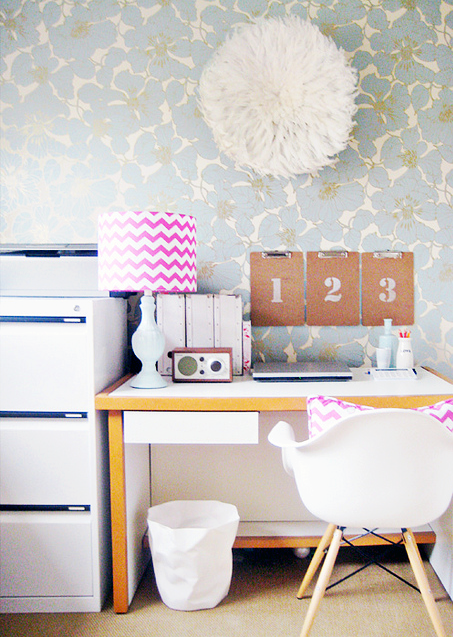
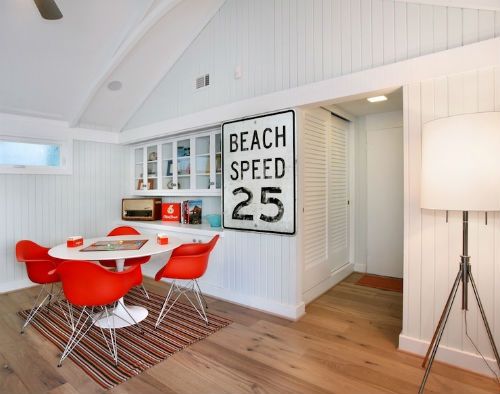
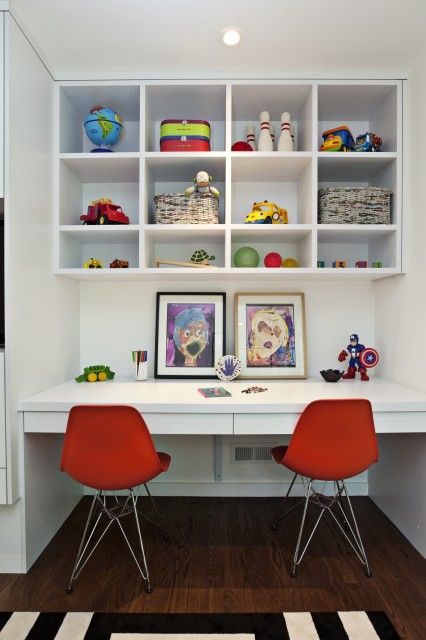
I guess that's why I love the Eames Eiffel chair. It's one of those pieces that by itself is so industrial, so plastic and chrome and nothing else but it's a chameleon, really.

Although originally created back in 1950 by wonder-couple Ray and Charles Eames, its popularity and relevance has not faded with time.

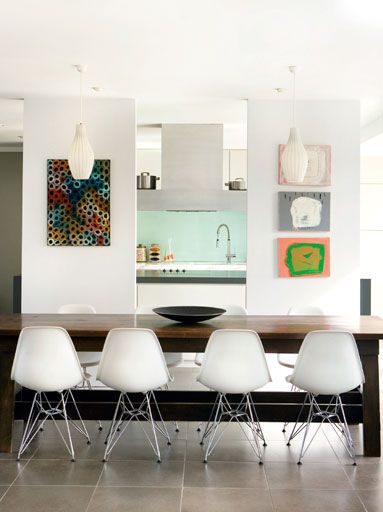
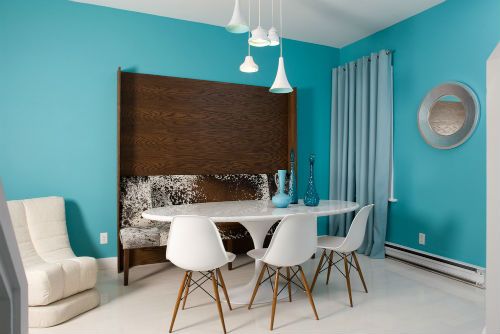
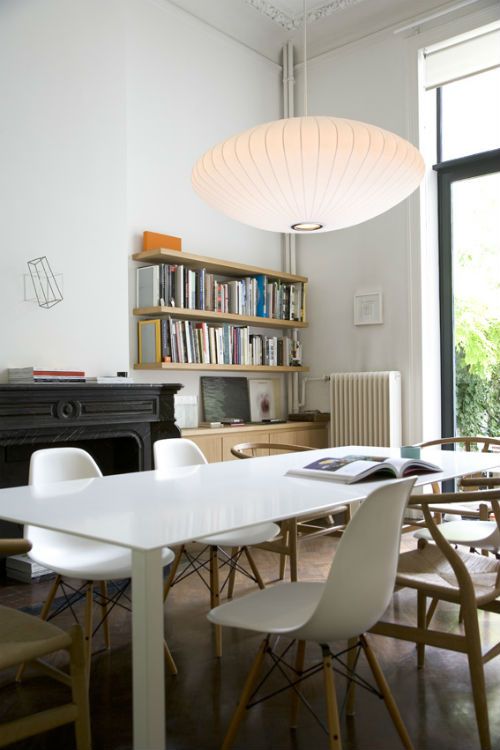
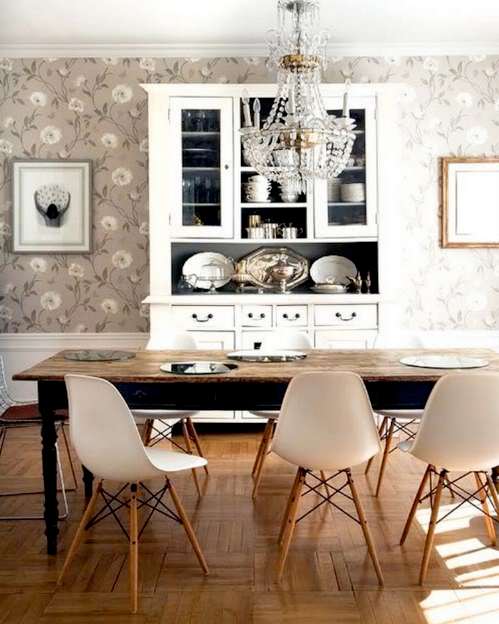
Just take a look at all it can do.....

via
http://www.lolalina.com


via
http://www.designclassics.co.uk


via
http://honeyliving.blogspot.com


www.vertigo-interiors.co.uk

via www.modernfindings.com


via blog.insideoutcolouranddesign.com.au


via www.colinandjustin.tv

via www.lolalina.com


via http://www.nuevo-estilo.es


via http://www.decorpad.com


via http://www.decorpad.com


via http://www.decorpad.com


via http://www.decorpad.com


via http://www.decorpad.com
 
There's a particular reason I'm posting these chairs....

I received a very well timed email from Kitchen Stuff Plus. Unfortunately, we cannot afford ourselves a set of Eames originals (heck, we wouldn't even be able to justify one!) but we definitely can afford a set from KSP so...

We're getting them! Soon! Like....hopefully in the next couple days!!!

Friday, July 27, 2012

Kitchen Nook Inspiration

I've been severely neglecting this blog. I have so much to post about but have just been feeling this general lack of energy in between work, running errands, puttering around the house, and dealing with the heat wave in the past couple weeks with NO AIR CONDITIONING!

I have however, been keeping up with my favourite blogs and today I came across this photo on Young House Love's blog (originally from House Beautiful).


via

I am in love! 1) I have that mirror (or at least, a cheaper version of it) and have yet to find a place for it. 2) The accent "wall" looks to be panelling which is a great idea as I'm not sure about doing such a dark color permanently. 2) The panel color is similar to our old living room accent wall, which I adored.

It's funny. Seems like I have a real weakness for this type of palette. Here's the photo that inspired our living room years ago (see Home Tour section of my blog):


via

Similar, no?

Now I'm really tempted to make a weekend project out of doing something similar in our kitchen nook.

Thursday, September 22, 2011

Walk This Way

Our first floor layout is a little quirky. There's a small foyer as you walk in and a powder room on the left. But the kitchen and living room are all the way at the other end of the house.

We have a long and narrow hallway wall to fill up in between. On one side, there's the foyer, stairs to basement/upstairs, entrance to kitchen...but on the other side? Just wall! See for yourself:


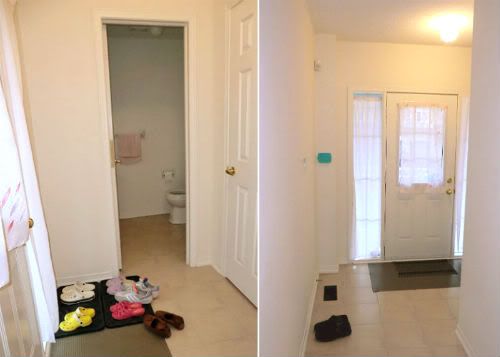
Foyer area with powder room on the left and a coat closet facing the main door.


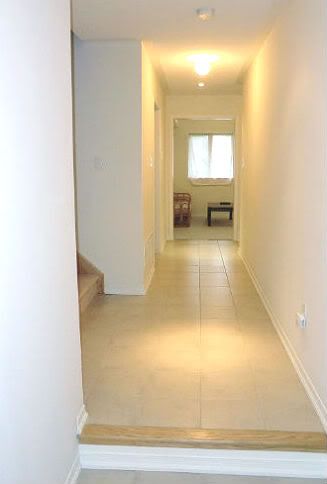
Hallway leading to the kitchen and living room at the back of the house and stairs on the left.

We need to fill up that wall space on the right without seeming like we're trying too hard. I like the idea of hanging frames in a collage, in a grid, or gallery style evenly spaced out at eye level. It could easily go wrong, though. 3 things I wan to be very careful in avoiding:

Too busy and claustrophobic - too many frames clustered in one part of the wall or too many frames all over.

Too cold and business like - symmetry and careful spacing looking too sterile and looking more like a professional gallery than a home

Too spanned out - looking as if we hung frames just to fill up the wall

Any thoughts on what we should do with this wall?

LinkWithin

Related Posts Plugin for WordPress, Blogger...